Dressurausbildung Daniel Köck

Bewertung: 4 / 5


M.Niehaus hat auf seinem Blog einen Beitrag veröffentlicht, indem es sein Script zum Entfernen der Windows 10 Built-in Apps vorstellt. Gleichzeitig hat er auch beschrieben, wie man das mit MDT 2013 in einer Task Sequence umsetzen kann.
Das Script erstellt beim Ausführen eine Datei RemoveApps.xml im Ordner des Script. Diese Datei kann man bearbeiten, wenn man nicht alle Apps deinstallieren will. Standardmäßig wir auch die Store App deinstalliert. Diese App sollte man aber nicht entfernen.
Bei der erneuten Ausführung des Scripts greift es auf die Datei RemoveApps.xml zurück und deinstalliert nur die darin angegebenen Apps.
Inhalt Remove Apps.xml
Microsoft.3DBuilder
Microsoft.Appconnector
Microsoft.BingFinance
Microsoft.BingNews
Microsoft.BingSports
Microsoft.BingWeather
Microsoft.CommsPhone
Microsoft.ConnectivityStore
Microsoft.Getstarted
Microsoft.Messaging
Microsoft.MicrosoftOfficeHub
Microsoft.MicrosoftSolitaireCollection
Microsoft.Office.OneNote
Microsoft.Office.Sway
Microsoft.People
Microsoft.SkypeApp
Microsoft.Windows.Photos
Microsoft.WindowsAlarms
Microsoft.WindowsCalculator
Microsoft.WindowsCamera
microsoft.windowscommunicationsapps
Microsoft.WindowsMaps
Microsoft.WindowsPhone
Microsoft.WindowsSoundRecorder
Microsoft.WindowsStore
Microsoft.XboxApp
Microsoft.ZuneMusic
Microsoft.ZuneVideo
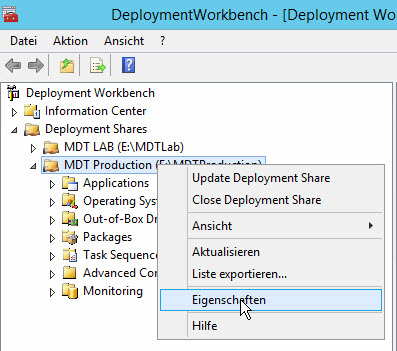
Umsetzung in Verbindung mit MDT 2013 U2 während der Offline Installations Phase
Damit das Script während der Offline Phase der Betriebssystem Installation ausgeführt wird, muss das WinPE Image um einige Features ergänzt werden.
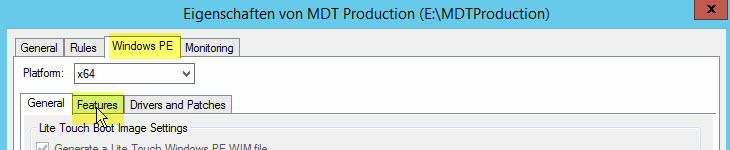
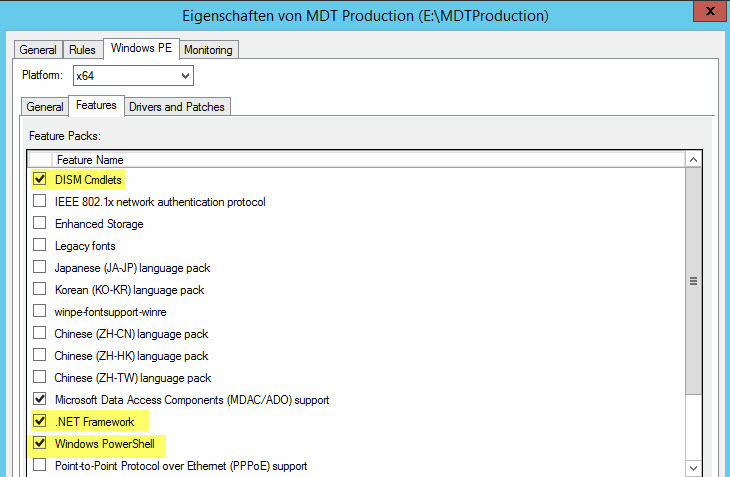
Folgende Features müssen dem WinPE Image hinzugefügt werden:
- DISM Cmdlets
- .NET Framework
- Windows PowerShell
- Storage Management Cmdlets
![]()
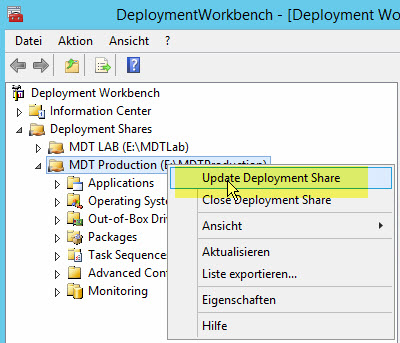
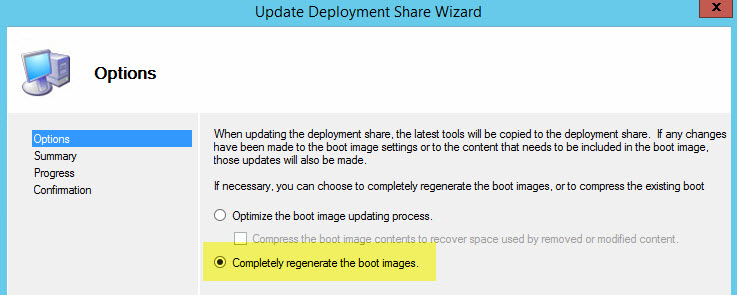
Anschließend DeploymentShare updaten und die Boot.wim entweder dem WDS oder dem SCCM hinzufügen
Aufgrund eines Fehlers im DISM PowerShell module wird das Script nicht ausgeführt. M. Niehaus gibt auf seinem Blog folgende Lösung als Workaround an:
The module import command fails with error 0x80131515. We’re still investigating exactly what’s going on with that, but in the meantime, there is a simple workaround, described at http://stackoverflow.com/questions/19957161/add-type-load-assembly-from-network-unc-share-error-0x80131515 for a similar problem. (For whatever reason, after running MSHTA.EXE, PowerShell thinks that the DISM module isn’t local.) Just add a step to your task sequence that copies a file named powershell.exe.config into X:\Windows\System32\WindowsPowerShell\v1.0 folder (or embed it in your boot image), with the following content:
<?xml version="1.0" encoding="utf-8" ?>
<configuration>
   <runtime>
      <loadFromRemoteSources enabled="true"/>
   </runtime>
</configuration>
If you do that prior to the step that runs RemoveApps.ps1, then the DISM module will load fine and the script will work. (With any luck, there will be a permanent solution in a future ADK release.)
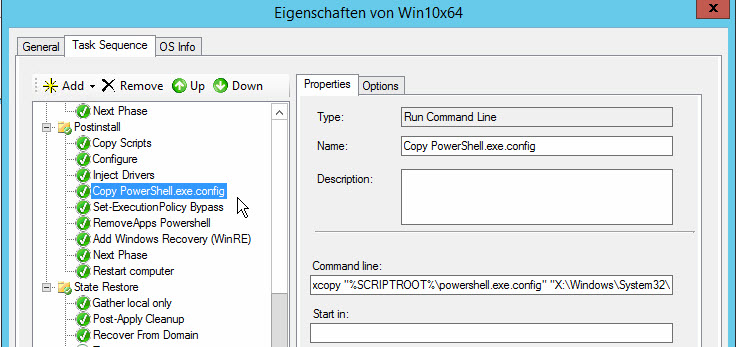
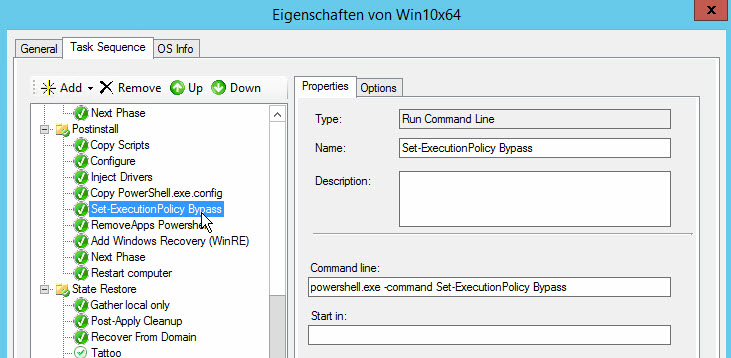
Erstellen der notwendigen Steps in der Task Sequence
Type: Run Command Line
Name: Copy PowerShell.exe.config
Command line: xcopy "%SCRIPTROOT%\powershell.exe.config" "X:\Windows\System32\WindowsPowerShell\v1.0\" /Y
Type: Run Command Line
Name: Set-ExecutionPolicy Bypass
Command line: powershell.exe -command "Set-ExecutionPolicy Bypass"
Type: Run Command Line
Name: RemoveApps Powershell
Command line: powershell.exe -file "%SCRIPTROOT%\RemoveApps.ps1"
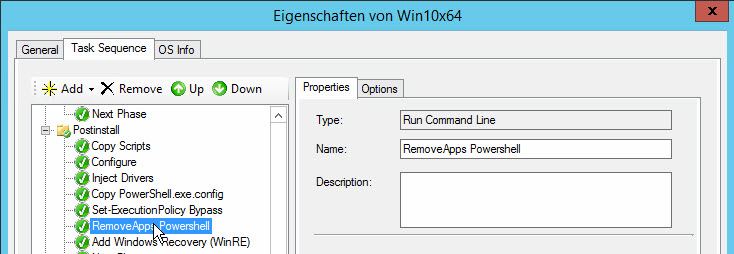
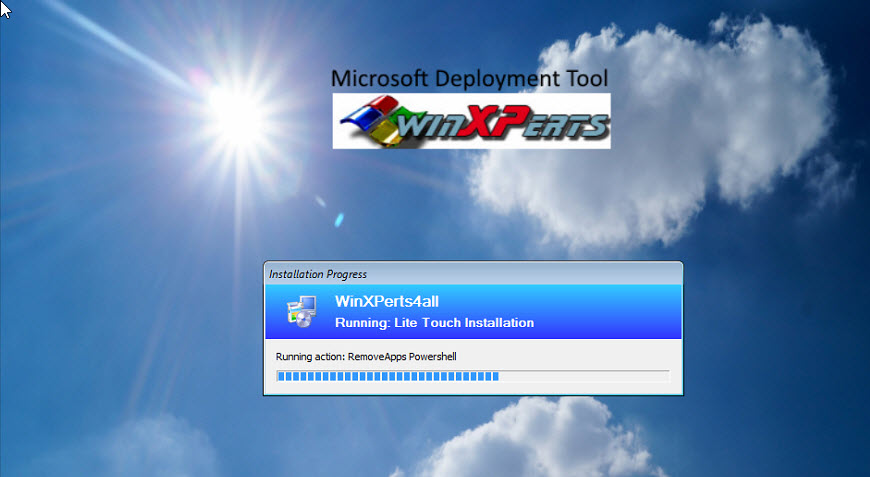
Bei der Installation des Betriebssystems werden nun die Apps deinstalliert.
Altaro

Windows 10/11 Updates
- KB5048652 Windows 10 22H2 19045.5247 Sicherheitsupdate Dezember 2024-12-10 20:13:53
- KB5048685 Windows 11 23H2 22631.4602 Sicherheitspatch Dezember 2024 2024-12-10 20:11:21
- KB5048667 Windows 11 24H2 26100.2605 Sicherheitsupdate Dezember 2024 2024-12-10 20:09:29
- KB5046732 Windows 11 23H2 22631.4541 optionales Update November 2024-11-22 06:31:54
- KB5046740 Windows 11 24H2 26100.2454 optionales Update November 2024-11-22 06:29:59
- KB5046714 Windows 10 22H2 19045.5198 optionales Update November 2024-11-22 06:27:06
- KB5046617 Windows 11 24H2 26100.2314 Sicherheitsupdate November 2024 2024-11-12 19:17:40